



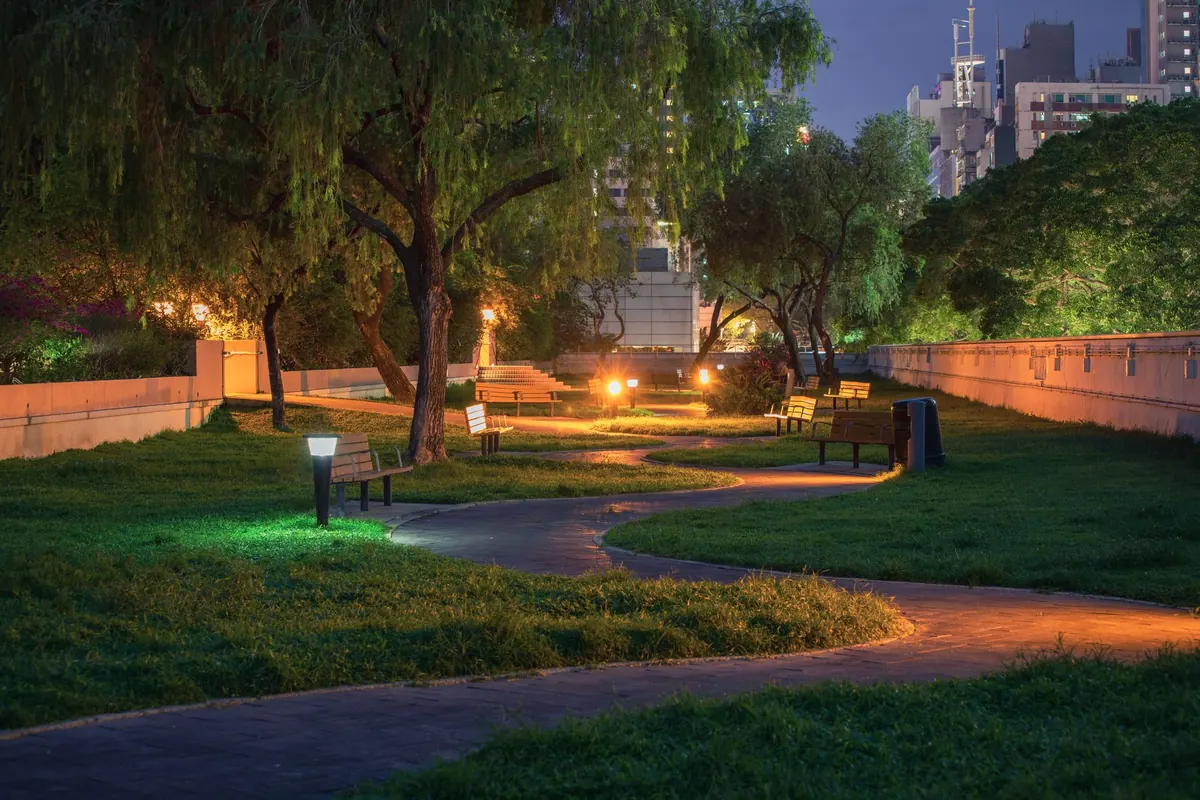
A path lit well stops being a lighting scheme and becomes simply a path you can walk at midnight without thinking about your feet. That is the whole trick. Decorative glass fixtures make it harder than it sounds, because glass does two jobs at once: it scatters light softly across the paving, and it lets you see the bulb that is doing the scattering. Get the spacing and the height right and the glass glows. Get them wrong and you have a row of bright dots with a dark stripe between each one.
What follows is the working method: how far apart to place fixtures, how high to mount them, how to run the cable without creating a hazard, and how to keep the glare out of your eyes and your neighbour's windows.
Start With the Walk, Not the Fixtures
Before you look at a single lantern, walk the path the way a guest would. In daylight, note where you naturally step, especially where the paving narrows or a planting bed pushes you sideways. Note the corners, the step edges, the spot where the lawn meets the gravel. Those are the places that need light. A tidy, evenly spaced row of fixtures often lights the edges of a path beautifully and leaves the middle dim, which is exactly backwards.
Sketch the route on paper and mark three things: the walking line, the obstacles (steps, potted trees, a drain cover), and anywhere you plan to cross the path with cable. Then measure the path's width. A 90 cm path and a 2 m path need different approaches — one row down the middle for the narrow one, two staggered rows for the wide one, or a single row along one edge if the other side has a wall or hedge to bounce light back.
Spacing: One Rule of Thumb and Three Exceptions
For a soft, continuous wash, space fixtures at roughly one and a half to two times their mounting height. A 45 cm bollard then sits 2 to 3 metres apart; a 25 cm stake light sits 1.5 to 2 metres apart. Tighten that by about a quarter if your paving is dark — charcoal slate and wet terracotta swallow light, and pools that look generous on pale stone will leave gaps on dark stone.
The exceptions matter more than the rule:
- Steps. Light the risers or the side of each step rather than the tread. On a long flight, one fixture every two or three treads on alternating sides reads as a continuous staircase; one per step is usually too much.
- Curves. On a bend, place fixtures on the outside of the curve. They mark the edge furthest from you and give the eye something to follow. Spacing measured along a curve is always shorter than it looks on the plan.
- Junctions and thresholds. Where a path meets a patio, a gate or a driveway, add one fixture — often a slightly taller one — to mark the change of surface. This does more for wayfinding than any amount of extra light along the straight run.
Mark tentative positions with bamboo canes and check them from the house at dusk. It takes ten minutes and saves an afternoon of digging.
Height, Angle and the Quality of the Glass
Path light belongs low. A glow at knee to hip height illuminates the ground and the edges of planting without throwing shadows up the walls. That normally means bollards between 40 and 60 cm, stake lights between 20 and 30 cm, and hanging glass lanterns kept to the edges of a pergola where they light downward rather than outward.
The glass itself decides half the result. Clear glass around an exposed bulb is a small sun in your field of view; frosted, opal or seeded glass spreads that same output across a wider surface and turns a point into a glow. If you love the look of clear glass, choose a fixture with a cap, a hood or an internal shield above the bulb so the light is pushed down and the filament is hidden from anyone standing on the path.
Test one fixture before you buy nine. A cheap way to check glare is to set a lantern on a bucket at the intended height and walk toward it from twenty paces in the dark.
Cable Safety: The Boring Part That Matters Most
Decorative glass fixtures are heavy, breakable and often wet, which makes the electrical side non-negotiable. Two rules come first: the circuit must be protected by an RCD (residual current device) at the consumer unit, and the connection to the mains supply should be made by a qualified electrician. Everything after that you can plan yourself.
- Match the system. Many glass garden lights are low voltage, running from a 12 V transformer or driver; others take mains voltage. Never mix the two on one run, and check the total wattage of your fixtures against the transformer's rating before you add a tenth lantern to a circuit built for eight.
- Use cable rated for outdoor burial. Ordinary indoor flex in a sleeve will fail. Armoured cable, or cable inside a proper conduit, is what survives a decade of frost, roots and the occasional spade.
- Bury it deep enough to be safe from digging. Runs under a lawn or bed are typically laid well below the depth of a spade; low-voltage cable in conduit can sit shallower. Local rules vary, so confirm the depth with your electrician rather than guessing.
- Treat every joint as a weak point. Use gel-filled or resin-sealed connectors and proper IP-rated junction boxes — never tape, never a twist and a prayer. Keep joints above ground where you can reach them, or in an accessible enclosure.
- Leave slack and label the breaker. A service loop of 30 cm at each fixture lets you re-position a lantern or re-terminate a connection without splicing. Write "garden lighting" on the breaker and note where the transformer lives.
Check the IP rating on each fixture against its position. A lantern under a porch eave sees far less water than one standing in an open border, and the rating should reflect that difference.
Controlling Glare Without Killing the Effect
Glare is rarely about too much light. It is about light arriving at the wrong angle. A path can be beautifully bright to walk on and still uncomfortable to look at from the kitchen window, because the fixtures point at the eye instead of the ground.
Three adjustments fix most cases. Reduce the output — a dimmed fixture at 2700 K to 3000 K reads warmer and gentler than a bright cool-white one, and warm light on stone and foliage is what most gardens actually want. Change the aim so the beam hits paving and low planting rather than a glossy surface; a glass-topped table, a dark window or a still pond will throw a reflection straight back at you. And screen the source, using the hood of the fixture or a low clump of planting set between the path and the seating area.
Fewer, softer sources almost always look better than many bright ones. If a stretch of path feels dark, resist adding a fixture; first try shifting an existing one half a metre and see what happens.
A Test Walk Before You Backfill
Lay the cable loosely, stand the fixtures on their bases and wait for full dark. Walk the path in both directions. Stand where you will sit with a glass of wine. Look out of the bedroom window. Then photograph it — a phone photo at night exposes problems that the eye politely ignores. Only once the positions feel right should you trench, fix and backfill.
After that, maintenance is mostly housekeeping: wipe the glass a few times a year, because dust and algae film steal more light than you would expect, check the seals after winter, and keep planting clipped back so it does not swallow the fixtures by July. Do that and the glass will keep doing what you bought it for — not lighting a path, exactly, but making one feel looked after.
Photo: Gorma Kuma / Pexels